Pages

Monday, September 26, 2016

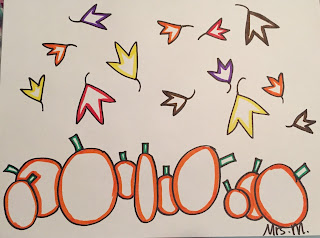
Fall Harvest Colors and Shapes

We will be using shapes and colors to create a fun Fall Harvest picture.
Follow along step-by-step!

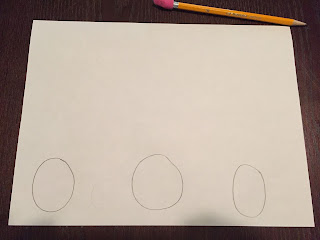
First, we draw a few circle, right along the bottom and pretty big.  


Next, we add a few more circle in between the bigger ones.  They can be small or big, you decide!


 Now, we fill in the blank spaces with even more circles or ovals.  It's okay if you want to leave some space blank if you want to.


Time to practice your rectangle making skills.  Add a small rectangle to every circle.  They can be on top or even on the side.

Now we are going to draw our leaves!  Let's start with part of a triangle. Like this!


Add part of a triangle to the side.  Like this!


 Add one more to the other side and close it up at the bottom.  You're almost there!


Add a stem and you have a leaf!


Now let's add a whole bunch of leaves!  Turn your paper as you draw them so some are upside down and sideways.  You can overlap a few too so they look like they are hiding a little bit behind another leaf.  Don't forget to add your stems!  Now we are ready for color!


Watch this short video to see how we are going to add color!


Don't forget to do just an outline of marker, then "paint" it in.  Pull the color to the middle! 

Sunday, September 25, 2016

Under the Sea

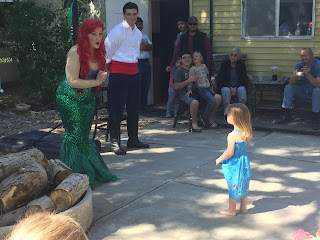
My granddaughter turned 3 this weekend and I got to make the cake.  I got to play with a new medium, modeling chocolate!  It was so much fun and it tasted good too!


Princess Ariel and Prince Eric even stopped in to say hi and sing to the birthday girl!


Monday, September 19, 2016

Optical Illusion Color Wheel

We will be using our mad math skills (fractions) to create this optical illusion (using line) that doubles as a color wheel we can use later. Plus it's a little Seussical too.


So get out your pencils and ruler and let's get to work. Here's the process:

Start by drawing a dot somewhere in the middle of your paper.  Then draw 3 lines dividing th space as equally as you can into thirds.


Pop Quiz!  We need to have 12 slices on our color wheel.  How many pieces do we need to divide each of our thirds into in order to get 12 slices?  

Next, divide each of those sections in half.


Then each of those sections in half!  Look how quickly we multiplied our slices.


Now we are going to VERY LIGHTLYwrite our color words in on our slices.  I hope you have practiced your ROYGBV!  The easiest way to get these in the right places is to start with ROYGBV (red, orange, yellow, green, blue, purple).  Those are our primary and secondary colors.  Do know which are primary and which are secondary?  Skip a slice in between each one.  Next we will fill in those tertiary colors. The name of tertiary colors always starts with the primary color name.

Now we are going to add some curved lines that will create our optical illusion.  First draw a curve in each of the ROYGBV slices that arches out.


Now draw a curve that arches in on the tertiary slices.  Make sure they all connect.


Now we do it again!  Curve out on ROYGBIV.


Curve in on the tertiary!  Make sure they connect!


Repeat until your whole paper is full.  Notice that some of the last ones won't go all the way around because we are working on a rectangle instead of a square.


NOW ON TO COLOR!

Watch this short video to see how we add color to help give us that optical illusion.  HINT:  The shading is the most important part!


Mathematical Mandalas

We will be using our mad math skills (some rotational symmetry, division, and protractor skills) and the element of line to create beautiful and creative Mandalas like these.
 
So get out your protractors, rulers, compasses, and pencils and let's rock this out. 
Here is some history about Mandalas.

Now watch this video to get started.


and...
This video will give you some tips for colored pencils!!


"I AM..." Poems

We will be using lines and our writing skills to create this fun and whimsical poem telling a bit about you.

 Let's check out the process here.  Start by drawing 5 wavy lines.  If you start with the middle one then do 2 on top and 2 on bottom, it will look great!
Now write "I AM" in the top space.  Go from the top line all the way to the bottom line with all capital letters.  Now write your name at the bottom.  Write in all capital letters top to bottom.

Now what words talk about you?  Let's brainstorm some ideas.  We need adjectives!  Finish the sentence, I am...  Maybe it's something you do.  If you dance, how can you add that to I am...?  Or maybe it's how you are.  If you a good friend to everybody, or you always tell the truth, how can you finish the I am...statement?


Now we get to add color.  Watch this short video to check out how we will be adding color to our piece.


Desert Landscapes

We will be using our observation and drawing skills with line and space to create a beautiful illustration of Utah's deserts. Here's an example I made.
Now let's watch a couple short videos about Utah's deserts.


Here are a few photographs and paintings by other artists.


Think about what special adaptations the plants and animals must have to live in such a dry and hot environment. What types of plants did we see?  How about animals?  Choose 1-2 animals and 2-3 plants to include in your desert landscape. 

Here is the process I used to create my landscape. Now it's your turn!  Make something beautiful. 


Time for Color!!!  Click the video below!


Seasons Tree

We will be using lots of line to draw our tree and our observation skills to create fall, winter, spring and summer parts of our tree.

Check out these pictures!!  We are going to create our own version of this!


What do we notice about what is on the tree in the Fall?  Winter?  Spring?  Summer?  What's on the ground?  What does the sky look like?  We are going to use these ideas to create our own Seasons Tree!!

To start off with, we need to draw our tree.  Follow these instructions to create your tree.